The Passage
God I love this short:
It’s like when people say “shorts should really be under 15 minutes, unless…”
This is the unless.
The cut back to the guys struggling with the mannequin is magic.
The long dark winter of the edit
Blessed without a day job I’ve had hours upon hours to sit with my movie and polish the cut. The days blend together. I think I was sick a few weeks ago. Or was that last week? My birthday was a month ago and I’m not sure what I did that day or night.

I was thinking today, why does it get harder as you get closer to being done? There’s the sort of obvious answer, which is that it’s scary to ship stuff. It’s scary to say “here, this is it.” Much easier to say “this is the rough cut, what do you think?”
But I think there’s a practical (and unavoidable) reason why the last 20% takes 80% of the time.
It’s like when you go to the ophthalmologist1 and she’s flipping back and forth, number one or number two, how about four, that’s four, now five, etc.
It gets harder with each level because the difference is more noticeable, she’s tacking in from a wide chasm to a narrow one so each step gets progressively harder to detect a difference. When you can’t tell the difference anymore, that’s your prescription.
So movies. At the beginning, there’s lots of fast progress. You start the day and you have no scene and then a few hours later you have a scene. It’s not done necessarily but you took it from 0 to 0.8 in a day.
And then as you get deeper in, the changes become finer. It’s harder to tell the difference. Is it better this way or that way? How can I tell, I’ve been looking at this for days, maybe I’ll send it to a friend to see what they think.
All of this and the quality approaches a local maxima, an asymptote, as close as necessary to perfect.
And as you reach the asymptote, you start to question: are we really there? Is it done or do I just want it to be done?
just realized I’ve been misspelling that as “opthamologist” my whole life ↩
Newsletter: Berlin + Feature Film Update
Reposted from today’s newsletter:
It’s December and for most Chicagoans that means turning inward to look deep inside ourselves and ask the age-old question: am I really going to do this fucking winter thing again?
“No! No, I am not!” I declared to myself while waiting for Amazon autoplay to kick in the next episode of Marvelous Mrs. Maisel.
I am going somewhere that is two degrees warmer on average, slightly less windy, but even grayer and rainier. That place is Berlin and I hear that it is NOT lovely this time of year. I don’t care. Coffee tastes better in the winter. And it’s a great time to GET STUFF DONE.
Anyway, I’m going for a month.
// still-untitled feature film update
I spent a weekend in November in NYC with Anna, the editor. The movie is like almost there. I screened a rough cut for some friends this week and the consensus was “it’s like almost there, but here’s 20 things you should think about or change.”
So, back to editing. ETA is still TBD but looking at Q2 FY2019.
Also, I’m really proud of this movie! It’s really weird! I’m still very shocked but eternally grateful that my friends read the script and said “we should make this.” I think half of doing anything big is just having friends who will shrug their shoulders and say “yeah, why not?”
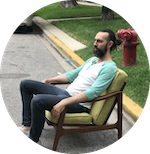
Here’s a picture of the production from when it was summer:

(photo by Jeanne Donegan)
Have you seen The Favourite yet? It’s so so funny. And good.
That first assembly
I just got the first cut of my feature film this week from the editor in NY.
I still don’t have a title so it’s called Dinner Party. Still untitled. It’s a rough assembly of the first 32 minutes.
Watching rough cuts, especially that first one, is never really pleasant. Mostly I was dreading it, dreading that it would be bad or stupid or terrible or a waste. That’s self-doubt of course, but the fear is real. Sometimes what you make is not good.
Some of it works really well, some of it needs work. I’m relieved. It’s going to be OK. With a lot of work, it might be better than OK or perhaps good or very good or excellent or even great. I won’t know until we put in the work.
Wrapped on my first feature film

We wrapped a week ago. My first feature film as a writer/director/anything. The working title is Dinner Party Movie and that will definitely be changing.
It’s the most difficult thing I’ve done, the most I’ve ever given myself over to a singular pursuit — six weeks of intense commitment, devoted almost entirely to the single endeavor of making the film. And of course there was much work before that.


We shot 71 pages in 10 days, doing 8-10 hour days. And yes, there were some actual 8-hour days in there, which is hard to believe. Most people assume that an indie production will be 12-hour days, which I don’t really believe is sustainable for more than two or three days. The work will start to suffer and attitudes will sour, and then the culture will start to break down. At least that was my fear — we never really pushed it except for a single 12-hour day in the 2nd week.

People have asked me if it was “fun” and I always laugh and say no, no it was not fun, at least that’s not the first word that I’d use. Yes, there were moments of fun and joy and laughter and all that, every day. Making it with friends meant it was an infinitely more rewarding and relaxing experience. But, it was intensely overwhelming, stressful, and mentally and physically exhausting. Joyful yes, fun no.


The biggest difference between directing a short and a feature: I felt my role was much less about directing each scene with precision, but rather about steering the whole project in the right direction, tone management, making sure that each piece would fit into the larger whole — about seeing and feeling how the whole film would cut together, constantly cutting and re-cutting it in my head.


I learned that we can question just about everything related to production and budget. The going rates for things are always negotiable. You don’t need x number of crew. Most crew positions can be done without. Everyone knows this and yet hardly anyone really believes it or is willing to follow the premise to its conclusions and make something this way.

People told me that I was very calm and relaxed on set. Outwardly, I suppose I was. I’m not frantic and I didn’t yell or snipe at people. Inwardly, my God, a different story. I was waking up in the middle of the night panicked, waking up with crushing doubts about myself and the material, and often feeling like a complete failure.
Then there were the highest of highs, times when I felt like the work was very good and that the final product would be very good, and then I’d wade back into another eddy of anxiety and depression and back and forth for two weeks.


There were many moments of fun, joy, happiness, and excitement. But I could always feel the bear behind me. And now, to be free from the bear, is a sweet sweet feeling.
The worst sin a filmmaker can make
This morning I went to a cafe to work on the script. The directing part of the script. I read through my old notes on Sidney Lumet’s Making Movies, an excellent book on directing. The main thesis of the book is that every movie has a theme, a central principle, truth, or message.
That theme guides all other choices. Once you have that theme, it’s easier to make your decisions and answer questions.

I spent about three hours thinking through the theme and how I want the camera to move and what do to with framing, the key moments of the film, the tone, and the rhythm. The rhythm is so important to me and I’ve learned from experience not to leave this to the editing room because there’s only so much you can do with cutting.
The movie is dialogue-heavy so it needs to feel in motion and to move forward at all times, so as not to get stuck in the single location.
And I leafed through my dog-eared copy of Werner Herzog’s book, A Guide for the Perplexed, which I love dearly.
When he’s not talking about being shot in the stomach or bamboozling border agents, he says things like:
The best advice I can offer to those heading into the world of film is not to wait for the system to finance your projects and for others to decide your fate. If you can’t afford to make a million-dollar film, raise $10,000 and produce it yourself.
Guess that one stuck.
This should be a lesson to filmmakers today with inexpensive digital technology at their disposal. You need only a good story and guts to make a film, the sense that it absolutely has to be made.
And
I learnt that the worst sin a filmmaker can commit is to bore his audience and fail to captivate from the very first moment.
And of course because why not
I tried things out with various pigs during pre-production, but none of them became altitude sick.
Sidney Lumet on Editing
I was going through my notes as I work on editing The Deadline and I found this quote:
In music, everything from a sonata to a symphony uses changes in tempo as a basic part of its form. Typically, a four-movement sonata will change not only its musical themes in each movement, but also its temo in each movement and sometimes even within each movement.
Similarly, if a picture is edited in the same tempo for its entire length, it will feel much longer. It doesn’t matter if five cuts per minute or five cuts every ten minutes are being used. If the same pace is maintained throughout, it will start to feel slower and slower. In other words, it’s the change in tempo that we feel, not the tempo itself.
Quoted from from Sidney Lumet’s Making Movies.
I read this and thought about how I cut Words Fail Me and realized that I used jump cuts (LOTS OF JUMP CUTS) to speed things up and now I realize that by making (most of) the episodes move so quickly without changes in tempo, I was actually making it feel slower.
With The Deadline, I’ve been using tempo changes more effectively (I think) and taking Lumet’s advice in conjunction with Walter Murch’s advice to cut on changes in emotion/thought (and his Rule of Six), I’ve at least got a better approach to how I edit, as opposed to just winging it.
Feedback in the editing process
I like to get feedback on my work throughout the writing process, by doing readings (in front of audiences of other writers or live audiences, depending on what stage the script is in) and I started getting feedback on my rough cuts when I did Words Fail Me last year. Last weekend, I had six friends come over and we watched the latest version of the rough cut of The Deadline.
I prefer to do the screening in my apartment because then people will actually sit there and watch without distraction–it’s hard to sit through a short film when you’re home alone and your phone is beckoning to distract you (at least it is for me).
I thought it was going to take about an hour — 15 minutes to watch it and 45 minutes to discuss, but we ended up talking for about 2 hours. The feedback was really great and it allowed me to see things that were in front of me but had become invisible through repetition. And there were a couple of beats that I loved but everyone said that they should be cut. It’s heartbreaking because I really loved those parts, but they just didn’t work for the story.
And there were some notes that I will not be using. I think you shouldn’t take everything, otherwise people will feel too much responsibility when they give a note, because they know you will take it.
And sometimes there are secret reasons for doing something and you just have to trust your gut that they are for the best. Feedback should make the work stronger and make you a better editor. I wonder if mastery of editing would mean that your instincts are so refined that all feedback would be superflous.
Tony Zhou on editing
Who needs film school when you have Every Frame is a Painting? This couldn’t have come at a better time for me, as I’m getting into the exciting but difficult part of editing The Deadline.
Speed up Adobe Premiere Pro with previews (how to get rid of those yellow and red lines)
I don’t know how I didn’t know about this. I’ve been trying to edit some really high-res footage from The Deadline and Premiere has been dropping frames like crazy (you can hit Ctrl-Shft-F11 to see if frames are dropping). Basically, it’s been really choppy and impossible to get into a good state of editing flow because of the choppiness.
Then I discovered that you can render previews of the footage. Basically, it’s the same as rendering an export, but you’re having Premiere render video to be used within the project. It doesn’t change the underlying source files, but it means that you can work with and edit much smaller preview files and get smoother playback in the monitor.
Here’s how you do it:
You can render any part of a sequence that falls under a red render line. You can also define a section of the sequence you want to render by setting In and Out points.
Render a preview file for a section of a sequence setting In and Out points:
1. Set In and Out points to mark the area you want to preview.
2. Choose Sequence, and select one of the following:Render Effects In to Out Renders the sections of the video tracks lying within the In and Out points containing a red render line. Alternatively, press Enter.
Render In to Out Renders the sections of the video tracks lying within the In and Out points containing either a red render line or a yellow render line.
Render Audio Renders a preview file for the sections of the audio tracks lying within the work area.
Note: You can set Premiere Pro to render the audio tracks whenever you render the video tracks. For more information, see Render audio when rendering video.
The rendering time depends on your system resources and the complexity of the segment.
These options are not available if the work area is enabled.
To maximize the quality of motion in rendered preview files, check the Maximum Render Quality option in Sequence Settings. For more information, see Settings.
Oh, and you know those yellow and red lines that you sometimes see on the timeline? Red means that Adobe thinks that you’ll have a hard time playing the footage in the monitor without dropped frames. Yellow means there’s a decent chance of dropped frames. And green (which I’ve never seen until today) means that you’re all good to go.
I feel relieved at finding this and a bit dumb for not finding it earlier.