Creating and querying a MongoDB View with Prisma in Next.js 13
So I’m building a little site called The Mold Guide and I’m leveling up my knowledge of working with databases in Next.js 13. One challenge is that I want to query one model in the database and then use some of the data from those records to look up a related piece of data in another model.
The issue: I want to display reviews of a doctor on the doctor’s listing page. But in addition to listing out all of their reviews, I want to to pull in the displayname of the user that wrote the review. The user’s displayName is located in the User model, meaning that in order for my application to get all the relevant data, it has to query the Review model, and then go through the User model to find the relevant Users.
With server-side-rendered components, this was relatively simple but it gets a little tricky with client components because you have to make one call to the database and then once that data is available, make another call to the database to enrich the data.
There are probably a bunch of ways to solve this, but I’m using Prisma views because it just makes writing the queries so much simpler.
I’m using Next.js 13, Prisma, and MongoDB. Other databases should work similarly.
First, we need to add the views feature to the schema.prisma:
// /prisma/schema.prisma

generator client {
  provider        = "prisma-client-js"
  previewFeatures = ["views"]
}
Then we need to create an Aggregation in MongoDB.
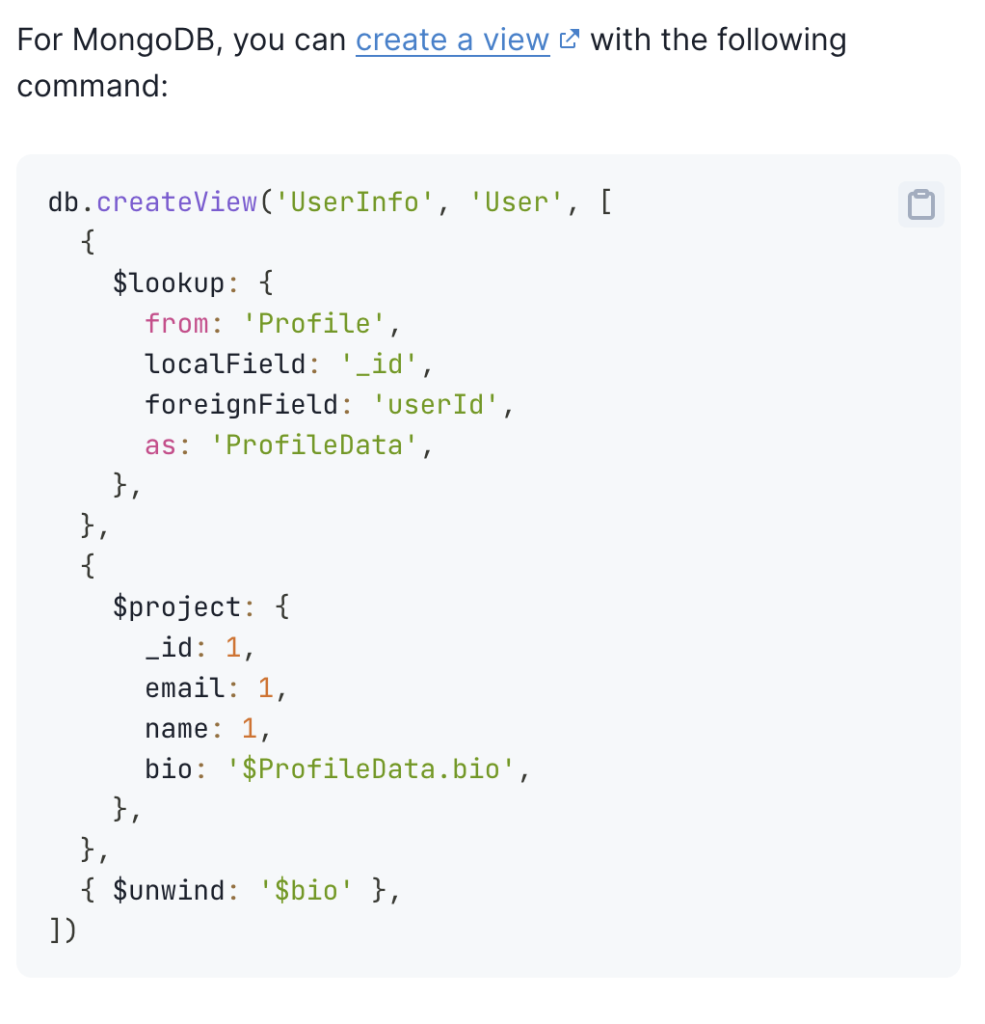
This part took me a while because every piece of documentation was giving me some variation of what the Prisma docs say:

Ok, sure, but where do you run that command? And what the hell does it mean? I guess you could write a Node script to connect to Mongo and then send that command but…
Creating a View in MongoDB Compass
There’s an easier way, using MongoDB Compass (download it and connect to your database before moving on).
MongoDB Compass has this great little aggregation builder that makes it really easy to build and preview a view.
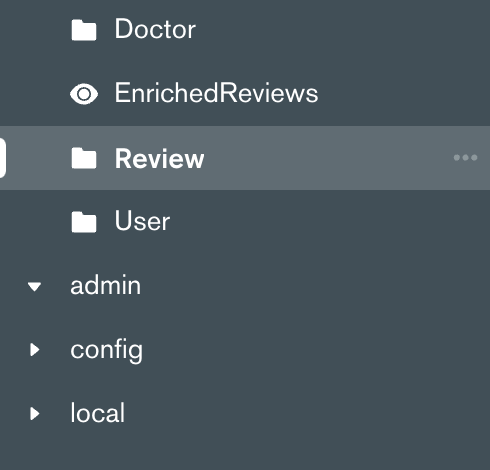
Once you have MongoDB installed and have connected to your database, go to the left sidebar and open up the Model that you want to use as the starting point for the view.
In my case, I want to add some simple User info to the Review records, so I’m starting with the Review model.

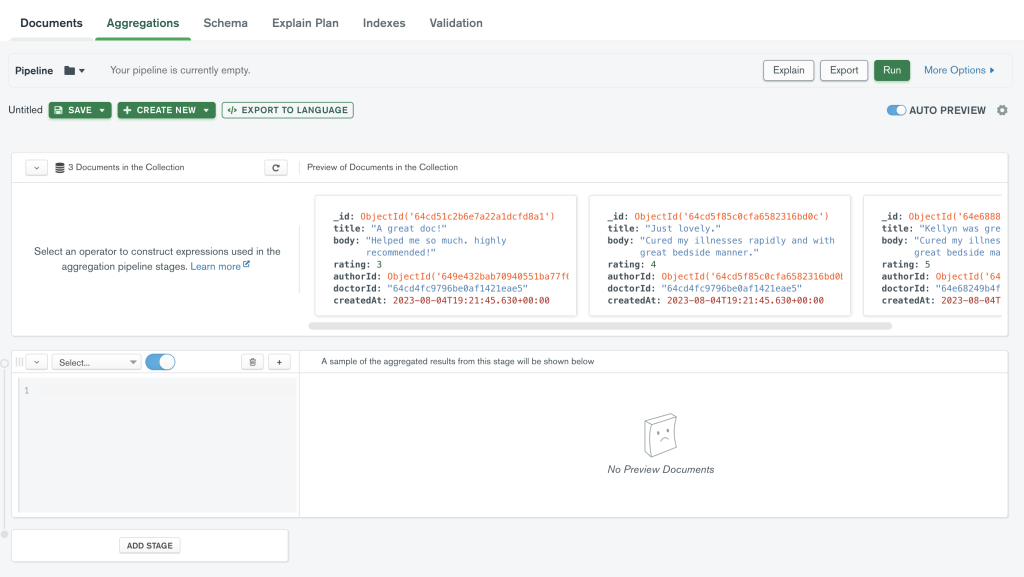
Then you want to select the Aggregations tab at the top of MongoDB Compass. You should see something like this:

Remember that db.createView() code from earlier? We can start breaking that down and putting it into the different stages of the pipeline builder.
The first stage is a $lookup, so you can enter that into the stage builder and you’ll get some boilerplate code:

Amazing. Now I’m going to fill out the variables to bring in some data from the User collection:

from: 'User' means that we’re going to join some data from the User collection with the Review collection. The localField: 'authorId' should correspond to the foreignField: '_id' in the User collection.
In other words, because I’ve created a relationship in prisma.schema between the User and Review collections, I can now match Review.authorId with User._id in this $lookup.
Here’s what that looks like in prisma.schema:
model User {
  id          String   @id @default(auto()) @map("_id") @db.ObjectId
  name        String?
  email       String   @unique
  password    String
  displayName String?
  reviews     Review[] // Establishes a relationship with the Review model
}

model Review {
  id        String   @id @default(auto()) @map("_id") @db.ObjectId
  title     String
  body      String
  rating    Int
  author    User     @relation(fields: [authorId], references: [id])
  authorId  String   @db.ObjectId
  Doctor    Doctor?  @relation(fields: [doctorId], references: [id])
  doctorId  String
  createdAt DateTime @default(now())
}
The as: 'UserData' line in the query just gives us a name for the data we’ll be reading from the User collection.
Ok, now to the next step, using $project:

The first seven lines are just telling MongoDB that we want the view to display the normal data from the Review collection. You can add or delete lines, depending on what you want your View to include.
The final line is where the magic happens, as we pull in some data from the User collection with this code:
authorDisplayName: '$UserData.displayName',That’s telling MongoDB to find the displayName from the associated User record and include it in this view, alongside the other Review data.
And then the final step is to $unwind it:

Basically, this converts the authorDisplayName from an array to a string.
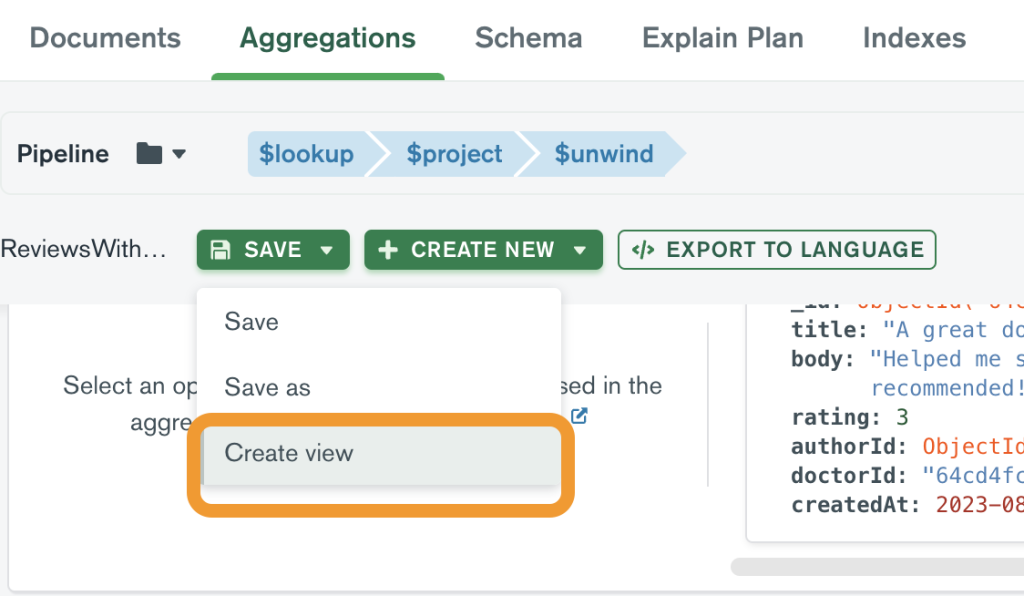
OK, so we have our aggregation all ready to go. Now, we just need to save it as a View. Open the Save dropdown menu and click Create view:

You’ll see a pop-up that asks you to name your View and once you save that, you’ll now have a View that can be queried just like a normal database Model!
Querying the View
Before being able to query the View in Next.js you’ll have to update the prisma.schema to include the view. In my case, I added this:
view EnrichedReviews { // The name you gave your view when you saved it
// The various fields in your view:
  id                String   @id @default(auto()) @map("_id") @db.ObjectId
  title             String
  body              String
  rating            Int
  authorId          String   @db.ObjectId
  authorDisplayName String
  doctorId          String
  createdAt         DateTime
}
Don’t forget to run npx prisma generate to update the Prisma schema.
Server-side Queries
In a server-side component, you can query the view like you would query any normal Model:
const enrichedReview = await prisma.enrichedReviews.findMany({
  where: {
    displayName: 'Alice',
  },
})
Client-side Queries
To query the view from a client component, using the API, you can build a route for querying the View.
In my /api/ folder, I created a new set of folders: /api/reviews-with-displayname/by-doctor-id/[id]/route.js
// /api/reviews-with/displayname/by-doctor-id/[id]route.js

import { prisma } from "../../../../lib/prisma";
import { NextResponse } from "next/server";

export async function GET(request, { params }) {
  const doctorId = params.id; // I'm using the doctorId in the API URL call
  const reviewsOfThisDoctor = await prisma.enrichedReviews.findMany({
    where: {
      doctorId: {
        equals: doctorId,
      },
    },
  });

  if (!reviewsOfThisDoctor) {
    return new NextResponse("No review with ID found", { status: 404 });
  }

  return NextResponse.json(reviewsOfThisDoctor);
}
And here’s what the call looks like in my client component:
"use client";

// React
import { cache, use } from "react";

// Pulls from a Prisma view that joins the reviews table with the users table
const getDoctorReviews = cache((doctorId) =>
  fetch("/api/reviews-with-displayname/by-doctor-id/" + doctorId).then((res) =>
    res.json()
  )
);

const DoctorReviews = ({ doctorId }) => {
  // Use the cached query
  let reviews = use(getDoctorReviews(doctorId));

  return (
    <div className={styles.doctorReviewsContainer}>
      <h3>Patient Reviews</h3>

      {reviews &&
        reviews.map((rev) => {

          return (
            <div key={rev.id} className={styles.doctorReview}>
              <h4 style>{rev.title}</h4>

              <p style>{rev.body}</p>

              <p>
                posted by <b>{rev.authorDisplayName}</b> on {rev.createdAt}
              </p>
            </div>
          );
        })}
    </div>
  );
};

export default DoctorReviews;
Hope that helps!
A simple OpenAI Jukebox tutorial for non-engineers
I.
Skip to part III if you’re thirsty for music-making. You can come back and read this during your 12-hour render.
Jukebox is a neural net that generates music in a variety of genres and styles of existing bands or musicians. It also generates singing (or something like singing anyway).
Jukebox is pretty amazing because it can sorta almost create original songs by bands like The Beatles or the Gypsy Kings or anyone in the available artist list.
I don’t understand neural nets well enough to understand what it’s doing under the hood, but the results are pretty amazing, despite the rough edges.
This technology has the potential to unleash a wave of artistic (and legal) creativity.
It’s easy to imagine this thing getting really fucking good in a few years and all of a sudden you can create ‘original’ songs ‘The Beatles’ or ‘Taylor Swift’ for the price of a few hundred GPU hours.
Who has the right to publish or use those songs? Who owns what? What does ownership mean in this context? Does anyone think that our current judicial/legal systems are prepared to even understand these questions, let alone adjudicate them? Who is Spain? Why is Hitler? Where are the Snowdens of yesteryear?
Anyway, you can read more about it on the OpenAI website.
II. What I made with Jukebox
Early on in the lockdown, I made an experimental short film built mostly with stock footage.
I went looking for free music at the usual stock sites and as usual, came back disappointed. So I started looking for ways to generate music with AI because maybe it would create a kind of artificial or mediated feeling that I was looking to create with the short.
Here are the some of the songs I created, of varying quality:
Or check out OpenAI’s collection of samples. It’s wild how good some of these are.
I don’t have the compute power that they have, but the samples I created were enough to create a surreal soundscape for the film:
II. Overview and limitations
OpenAI uses a supercomputer to train their models and maybe to generate the songs too, and well, unless you also have a supercomputer or at least a very sweet GPU setup, your creativity will be a bit limited.
When I started playing with Jukebox, I wanted to created 3-minute songs from scratch, which turned out to be more than Google Colab (even with the pro upgrade) could handle.
If you’re going to do this with Google Colab, then you’ll want to upgrade to the Pro version. It’s $10 a month and recommended for everyone that does not enjoy losing their progress when the runtime times out after six hours.
Because it took me about 12 hours to generate each 45-second song, my experimentation was limited, but after a lot of trial and error, I was able to consistently generate 45-second clips of new songs in the style of many musicians in a variety of genres.
Another challenge is the lack of artist-friendly documentation.
AI researchers tend to publish their models and accompanying documentation for a computer-science-researcher-type audience — I’m trying to bridge that gap so that artists and non-technical people can play with the technology.
Hopefully, in the future, we’ll see more user-friendly documentation for these kinds of tools — if musicians had to be electrical engineers and wire their own amplifiers, we probably wouldn’t have rock music.
III. Getting set up
Step one is to open up the Google Colab notebook that I created, Jukebox the Continuator. This is a modified version of the Colab notebook that OpenAI released.
My version of the notebook has been trimmed down to remove some features that I couldn’t get to work and I think it’s an easier way to get started, but feel free to experiment with their version.
If you want to save your edits, save a copy of the notebook to your Google Drive.
If you’re new to all this, Google Colab is an interactive coding notebook that is free to use. It’s built on the open-source software called Jupyter Notebook, which is commonly used to run machine learning experiments. It allows you to run Python code in your browser that is executed on a virtual machine, on some Google server somewhere. Much easier than building your own supercomputer.
You might want to check out Google’s intro to Google Colab or google around for a tutorial.
You should be able to run my notebook all the way through with the current settings, but the fun is in experimenting with different lyrics, song lengths, genres, and sample artists.
And as I mentioned above, you’ll want to upgrade to Google Colab Pro. It’s $9.99/month and you can cancel whenever you want. Getting the Pro version means you’ll have access to faster GPUs, more memory, and longer runtimes, which will make your song generating faster and less prone to meltdown.
IV. Lyrics generation with GPT-2
Jukebox allows you to write your own lyrics for the songs you generate but I decided to let an AI generate lyrics for me, with a little help from the creative writers of stock footage clip descriptions.
I was going for a sort of surreal dystopian aesthetic so I pulled the descriptions of some random stock footage clips, e.g. “A lady bursting a laugh moves around holding a microphone as bait as a guy creeps”:

Then I loaded Max Woolf’s aitextgen to generate lyrics based on the seeded text. Here’s a tutorial for aitextgen or you can use the more user-friendly TalkToTransformer.com.
You can train aitextgen with the complete works of Shakespeare or your middle school essays or whatever text you want.
Happy generating.
Setting your working directory to Google Drive in a Colab notebook
There are plenty of articles detailing how to mount your Google Drive to a Google Colab notebook. It’s simple, you just run this in your notebook:
from google.colab import drivedrive.mount('/content/drive', force_remount=True)But what if you want your notebook to use a folder in your Google Drive as the working directory?
That way, any files that are created within your project will automatically be saved in your Google Drive. If your project runs 12 hours and then times out due to inactivity, any files or checkpoints created will be in your Google Drive.
I wrote a quick script to do this. Just change the project_folder to the folder you want to use. The script will create the project_folder from scratch if it doesn’t exist and then set it to the current working directory.
It also creates a sample text file in that directory to verify that it’s working.
You can run !pwd in a notebook cell at any time to verify your current working directory.
import os

# Set your working directory to a folder in your Google Drive. This way, if your notebook times out,
# your files will be saved in your Google Drive!

# the base Google Drive directory
root_dir = "/content/drive/My Drive/"

# choose where you want your project files to be saved
project_folder = "Colab Notebooks/My Project Folder/"

def create_and_set_working_directory(project_folder):
  # check if your project folder exists. if not, it will be created.
  if os.path.isdir(root_dir + project_folder) == False:
    os.mkdir(root_dir + project_folder)
    print(root_dir + project_folder + ' did not exist but was created.')

  # change the OS to use your project folder as the working directory
  os.chdir(root_dir + project_folder)

  # create a test file to make sure it shows up in the right place
  !touch 'new_file_in_working_directory.txt'
  print('\nYour working directory was changed to ' + root_dir + project_folder + \
        "\n\nAn empty text file was created there. You can also run !pwd to confirm the current working directory." )

create_and_set_working_directory(project_folder)
View the code on Github or in this public Google Colab notebook.
